
The new year started with a trip to Salisbury, North Carolina for the 2010 RPCA convention. Some highlights relevant to 1146:
We met the ew Amtrak PV man: Mr Michael L. Burshtin, P.E. - Director, Systems Engineering/Private Cars in the Rolling Stock Engineering group of the Mechanical Department. His predecessor, Harold Weisinger, is continuing as a qualified private car inspector.
Amtrak is updating documents for PVs.
Amtrak SMPs specify that structural welding be done by an ASME-certified welder. This includes the collision posts, center sill, side sills and body bolsters. The rest of the framing is considered secondary structure and does not require an ASME certification.
Amtrak inspectors noted several problems found with hand brake chains in 2009: Repair links which bind before the brake shoes are tight, making it appear the handbrake is set, and chains which touch the 480v HEP cables when tightened.
An FRA engineer spoke. One interesting issue is the new requirement for tool-less emergency entrance windows, for fire and rescue purposes. This includes posting instructions for opening the window. When asked about theft and vandalism, the engineer was only able to note that Amtrak is already experiencing problems.
The FRA engineer also mentioned the issue with end hand-holds which must be within 1" of the vertical plane of the end sheet, yet have a minimum 2" clearance for one's hand. Adding the Amtrak MU and COMM receptacles forces violation of this rule. The FRA has decided to consider all such cars to be "of special construction" and thus exempt.
FRA web sites of interest are http://www.fra.dot.gov for current regulations and the MP&E Compliance Manual, and http://regulations.gov for updates, proposed rule changes, and waiver request dockets.
The RPCA board voted to form a Mechanical Technical Advisory Committee (MTAG) to advise on issues of changing interchange or regulatory requirements and their application to private cars.
Vendor Kor-Pak was there, showing their Manganese Steel pedestal liners, graphite-impregnated phenolic anti-friction wear liners, Fabreeka pads for spring cups, and molded rubber components. I was interested to hear that they can and will do custom work, and have managed to cross-reference most of their parts to old PowerParts part numbers.
Forbo Flooring was there, showing Marmoleum Decibel samples. This is true Linoleum (Linseed oil, rosin binders, wood flour, limestone and dry pigments) with a foam backing which achieves 17 decibel reduction of transmitted sound. They were also showing imported British transit carpets which meet requirements for use in the Chunnel - but have not yet been certified in the United States.
I talked to Tony Stauffer from Stadco about their three lines of gensets for passenger cars. The largest are the Mark 5, ranging from 62 kw to 200 kw under-car. In the middle are the HR, ranging from 30 kw to 62 kw under-car. (An HR62 and Mark 5 5-62DA are identical, except the Mark-5 has better engine protection and insulation materials.) The smallest are the Cellpac and Skid Base generators, which spare the expense of the under-car mounting enclosure. I also asked about vibration- and noise-dampening options. The under-car enclosures all have dampeners on the engine mounts, but there is also an optional fixed mounting rail (not roll-out) with additional dampening.
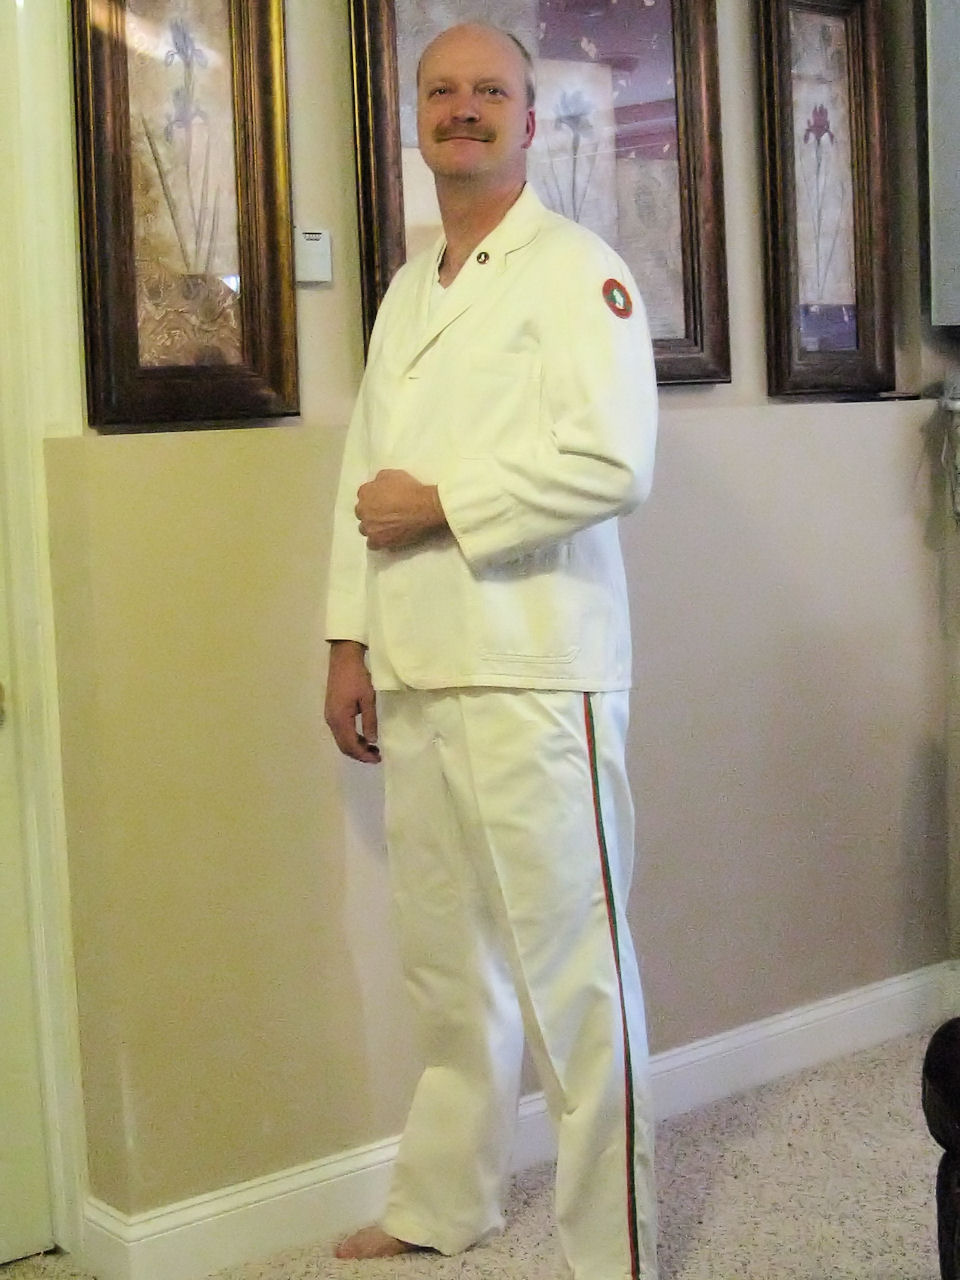
The folks from Transquip (Sandhill Coach Lines) were there showing their uniforms. They do make Great Northern buttons to fit the cook and waiter uniforms I acquired. If I were to send those in, they would be willing to reproduce them. We talked about Polyester vs. Cotton in the kitchen - the former is a definite fire hazard.
| The Fuering family was there, with samples of what is left of Bill Fuering's parts inventory. I nabbed an door holder which is close to what I need for the dining room end door. It's close to what I need, but not quite. |
A bit of good news: My 2010 insurance cost is 5% less than last year!
Another bit of good news: Starfire is busy laying out the vestibule repair - at my request, they are considering the collision post repair, the HEP installation, and (if necessary to clear) any handbrake relocation.
Starfire raised the question: Do I want the white dummy 27-pin receptacle on the right side of the coupler? (On either side of the coupler, working outward, are a black locomotive 27-pin MU connection for push/pull operation, a blue 27-pin communication line, and the white dummy on the right side only.) Amtrak drawing C-05-7171 was referenced. Not knowing its purpose I asked Bob Jackson at Northwest Rail Electric as well as an Amtrak car inspector. They explained that at the rear of a train, Amtrak will plug a jumper cable in between the COMM and the white dummy, in which two pins are tied together. This creates a continuous electrical loop, enabling the automatic door opener control in the locomotive. Mid-train cars do not need the loop-back, and private cars can be coupled on behind the loop-back. If they want to hear announcements, they just plug into the other COMM receptacle on the left side of the coupler. In fact Amtrak normally does not connect the COMM to trailing private cars, and it is considered optional equipment. Decision: I'll pass on the white dummy to simplify things.
 | The HEP connectors and handbrake chain locations do conflict. Since I'm going to stay with the fixed vestibule steps applied by the Great Northern rather than the original roll-up steps, Starfire needs the dimensions of the fixed steps. I measured all four (which are anything but flat!) and averaged the dimensions. Drawn on graph paper, the averaged measurements worked well. I arbitrarily allowed 1.5" of flat sheet to roll the edge, because that yeilds a 170-degree arc on the jig I built for A11's steps last year. |
While on the subject, a friend found that McNichols Co. manufactures TRACTION TREAD (tm) stair tread, which has the correct raised & perforated dimple pattern for GN-applied fixed steps. There's no picture on the site, but it's on page 39 of the Master Catalog when printed. (7 MB .pdf.)
1146 found itself the subject of a Flikr photograph. I'm guessing the photo was taken mid-summer, 2009. That's pretty cool.
 | I asked my local Dupont Imron dealer to try matching an interior color sample from the coach section. The dot on the left is his final mix. He mixed Imron 3.5 ST (satin). I'm thinking its a tad too flat and may try 3.5 SG (semi-gloss) as well. Their name changed again: Once GT Parts & Paint, then Carquest Automotive Finishes, they're now "National Coatings and Supplies". Still at 1166 S. Robert St. |
Here's the formula he came up with:
| Component | Code | Quantity |
|---|---|---|
| Balancer | 740P | 638.0 |
| Binder | 741P | 182.8 |
| Flattener | RK2900 | 1436.1 |
| White | 717P | 1386.1 |
| Black | 718P | 151.9 |
| Yellow Oxide | 722P | 78.5 |
| Red Oxide | 719P | 3.1 |
| Orange | 721P | 5.7 |
| Green | 725P | 1.0 |
The following pictures of the GN-applied fixed steps are for my structural engineer:
 | Handbrake detail. |
 | Right side of vestibule step at handbrake. The side overlaps the end structure by ~3". |
 | Relation of top-back notch to vestibule platform C-channel, end casting, and hand brake sheave. Note the back two of five step side mounting bolt holes extend through the sheave mounting bracket. Also, the top step's mounting bolts are obscured and must be flat-heads flush with step side surface. |
 | Right side of step - car end view. Note radiused filler between skirt and step was welded to rolled edge of step. Also, the top of the rolled edge meets the bottom of the framing. |
 | When installed, the bottom step extends beyond the bottom of the side sheet ~1". The step's rolled edge is deformed to an exact measurement is difficult. |
 | The bottom step surface is ~7" below skirt bottom on the right, and ~7 1/4" on the left. The skirt and step side should line up, but do not because of rust bulges and warpage. |
 | I used a square to determine the rise is 33" and the run is 31 5/8". With four steps, that's 8 1/4" up and almost 8" in each. This strip supports the trap door: The black pen mark corresponds with the outside edge of the bottom step. Treads and risers vary in width from 35 1/2" to 35 7/8" - being wider at the top. |
 | Left side: Note relation of notching to clear car structure. The black pen line extends the top of platform, while the tick on the aluminum corner notes the edge of the bottom step. |
 | Bottom step, seen from beside the #1 axle. Note the steps have a rolled nosing. |
 | Left side, seen from beside the #1 axle. The step side overlaps the body end wall by ~3 1/4". |
 | Visible side of a tread and riser. |
 | Underside of a tread and riser. |
I installed the BR-corner vertical stainless steel grab iron I bought last month through Ozark Mountain Railcar. It was perfect except for being 1/4" too long, so I welded a bolt to a plate, chucked that in a vise, and used a #8 rosebud torch to heat and bend it just enough to fit. (I heated it to an orange glow - at cherry red it was still too stiff to bend.) That discolored the stainless, so I wire-wheeled it then polished with 400-grit. Then, worrying that I'd caused problems, I did a little research. This conversation on forging and cleaning sounded encouraging.
The above reminds me that, back in 1997 when I was a brand newbie to all this, the museum's Chief Mechanical Officer had just gotten another car's stainless-steel grab irons back from being chemically cleaned. They looked great! (Still do.)
A reader wrote to ask: The GN removed 1146's skirts, except for the bits on either side of the vestibule steps. They're visible in the photos above. Do I intend to restore the skirt on the rest of the car? I replied, no, not at this time. The roll-up steps and full-width diaphragms would have disappeared around the same time, and I consider the later appearance more practical. They're relatively easy to apply, and could be done if the whim strikes.
 | Experimenting: The first MDO plywood restroom corner mock-up has been painted in grey Dupont Corlar 2.1 ST epoxy primer. Normally pretty thick, I thinned it a whopping 33-40% with reducer. It maybe soaked into the paper facing pretty well, but there are some "fuzz peaks" that need to be sanded and it didn't build enough film thickness to sand out. In the right light, I can see some of the texture of the plywood. I may try more primer - thicker - so that I can sand it smooth. |
 | After another coat of primer - reduced 20% - there was more than enough film thickness to sand it out. There was a mild orange-peel texture, so sanding would be mandatory. I'm using a Ridgid 6" sander with variable speed, two orbit diameters, dust collection and a velcro-like method of attaching the sand paper. Nice system. |
 | Starfire sent renderings of their handbrake proposal - to fix the conflict between the Amtrak MU and COMM receptacles and the handbrake chain sheave wheel. In this drawing, only the two sheave wheels move. The left wheel is currently horizontal, and the right wheel is now where the connector box is shown. |
 | Viewed from the opposite direction, with non-structural pieces removed for clarity. |
 | A slightly different angle - showing proposed end structure. |
 | This is what it will look like as the vestibule platform and end sheet are framed in. Note the chair will be above the top step, so the sheetmetal covers are required. Not quite historic, but certainly less obtrusive than any ideas I had had. I thought the handbrake mechanism would have to relocate. |
 | My engineer has had conversations with Amtrak and the FRA (apparently on behalf of several clients) about whether heritage equipment restoration should be governed by current APTA specifications or older AAR S-034. The APTA specifications are more stict. Their decision was that anything built prior to November 8th, 1998 is not governed by APTA. While doing calculations for collision post repair, he discovered the original design did not meet the AAR specifications. There is not enough structure in the roof to brace the posts in a collision. Therefore, he is proposing a 2"x4" box tube to brace the tops. |
I found an add for Central Sales & Service, Inc. in the December 2009 issue of Progressive Railroading magazine. Their products include locomotive cable cleats, window and door gaskets, rubber extruding and molding services, and machining services. Could be useful!
Starfire has requested measurements of the cut lever attachment to the end casting. I'll be getting those this weekend.
I inquired with Amtrak, to find out more about their SMP specification for qualified welders. Michael Burshtin clarified that he prefers a welder with AWS D1.1 certification (structural welding,) or equivalent. He does not require AWS D15.1 (railroad rolling stock welding.) He also requested the opportunity to review the engineering drawings before I start work. If possible, they should be marked with the Amtrak-assigned 800000-series private car number, to keep them from getting lost. I'll have to apply for one of those.
I'm being tempted. I'm already going back into debt for 1146 this year. What's another few grand if I want to install the Overhead AC Unit? It would make me happy, and the car would be warmer for hosting the slide show.
If anyone is interested, I recently received a quote of $120 each for fiberglass reproductions of the tear-drop Pyle-National marker lights which the GN used on the round-end observation and business cars. They are shells only - its up to the buyer to work out lenses, mounting, etc.
I've been getting educated on Huck fasteners. Go to www.huck.com. The Alcoa Fastening Systems page will appear. Click on the "Industrial" menu and then the red "HUCK" logo. That brings up the catalog page with LockBolts, Blind Rivets, and application tools.
The current tool for 3/4" lockbolts is the 2628. It works with BOM, C50L, HuckFit and HP8 fasteners in the 1/2" to 5/8" range, via eight different nose pieces. It weighs 17 lbs, is approx 4" in diameter, and takes 7400 psi to pull, developing approximately 40,000 lbs to swage the collar onto the bolt. On 1146, the 3/4" bolts will secure the collision posts to the end casting.
For 3/8" lockbolts, 2580 is the tool. It works with the 3/8" C6L, Magna-Grip and Magna-Lok. The tool weighs 5 lbs and is about 2 1/8" in diameter. On 1146 the 3/8" fasteners secure the end sheet to the posts and corners.
One vendor I'd like to highlight for their willingness to answer my questions is S&M Air Tool Service in Alabama. They were recommended as being able to repair old Powerig units - despite parts not being available. They also sell refurbished tools and Powerigs - the selection changes constantly.
Huck tooling is not cheap. So far I've not found any local equipment rental places - in fact, the only dealers I've found are in large cities having airline maintenance bases. Asking around, I haven't found many preservationists who need to huck anything. We're just not doing major work like replacing boxcar dreadnaught ends. May I'll buy them, do the work, and then sell them used to recover some of the money.
The alternative to Huck bolting is hot riveting. I have concerns: Its a more dangerous process, I'm told it takes practice to get skilled at it, I only know one person who has done it before, and the tooling available to me is, um, questionable.
I found that Champion Charter Sales & Service, who has a branch in St Paul, sells huck bolts and rents or sells the equipment. They have a $25 minimum order. Sample prices: 3/4" C50L - $3.00 pin, $1.50 collar. 3/8" C6L - $.60 pin, $.25 collar. Weekly rental of 940 Powerig with hose, one tool and one nose piece - $800. 2nd tool is $200/week, 2nd nosepiece is $100/week.
A CD containing finished engineering drawings from StarFire arrived on the 15th. They detail the collision post repair, Amtrak recepticle installation, handbrake chain rerouting to clear the receptacles, and vestibule end wall repair. (As requested.) I printed them, spent time studying them, and went back with questions.
A plug for Starfire: I was encouraged by their portfolio, and have been very pleased with their honesty, integrity, and the quality of their work.
The vestibule floor, trap doors, side doors, and body end wall I'll figure out from the original drawings. They're not structural so it didn't make sense to engage a structural engineer.
With the hand brake chain relocation, one of the sheaves which will move is right next to the asbestos-wrapped steam heat trainline. So, time for the under-car asbestos to go. I've asked two contractors to bid on the job. (And now I'm on the horns of a dilemma - the cheaper didn't actually look at it before bidding...)
 | While the first abatement contractor was out looking at the job, I took orange marking paint and marked all the steam heat pipes that need to go. (God forbid they get confused and take the air brakes!) I also torched the big valve body and linkage off the end, which was not insulated. Finally I started grinding the torch-cut welds down flush since I hate hitting them with my head. This picture also shows that I straightened the buffer plate - more on that in the next photo. |
 | On April 10th I'm hosting an "open kitchen" for museum volunteers. I wanted to do something fun, and that happens to be volunteer appreciation day. This one buffer stem had rusted solid in the compressed position - notice the blind end buffer is cocked in all the older photos - and I wanted it out to safely align with my steps. It took a 12-ton journal jack under the buffer, a screw jack to hold the other side, penetrating oil, a rosebud torch, and a sledge hammer to knock it loose. It still needs work but at least now it moves. |
Slightly unrelated, but taking an opportunity and planning ahead: My vestibule door hinges are pretty beat up. John Radovich has some new-in-box replacements from Amtrak. I'm buying ten - need eight, two for oops.
Warren Newhauser at IRM was nice enough to link to my site. Thanks!
 | This is an Ionator EXP made by ActiveIon, sitting on the kitchen stove I'd just cleaned with it. The technology is pretty cool - tap water is ionized and recombined in a spray, which forms a fairly agressive cleaner and sanitizer. Because no chemicals are used, it leaves no residue and is 100% green. I'm going to try it in 1146's stainless kitchen. (Buy one of these - the technology is licensed from my employer - and you'll be helping 1146's restoration by keeping me employed!) |
 | I cleaned the kitchen from stem to stern with the Ionator EXP - including under the floor mat. (First time ever.) The ACF construction drawings say the kitchen floor is made of Monel. I hadn't realized it also has several stainless steel patches. The stainless is welded directly to the Monel, which is interesting because Monel is a non-ferric Nickel-Copper alloy. Stainless seems to be more durable. The Monel has corroded patches, and many cracks perpendicular to the commisary door. |
 | These are the "new" hinges for the vestibule side doors, which I bought from John Radovich. |
 | Comparing the new hinges to the originals. The only visual difference is the originals had decorative knobs on top and bottom. (Yeah, I broke one off.) The dimensions and hole patterns are exactly correct. |
 | 1146 has a pie cabinet, and I've been wanting to put it to use. So, during the open grill for museum members, I stocked it with pies from Bakers Square. (Apple, Cherry, Blueberry and Strawberry-Rhubarb.) Those filled the shelves that are still in the car - need to have more made. Interesting that all the removable kitchen parts, like shelves, are stamped "1146". |
 | Here is the volunteer kitchen staff during the museum open grill. Four bags of charcoal kept it hot all day. Thermometers showed the grill top at 600 degrees, and an oven at 350 degrees. Note to self: Match-light is a bad idea in a hot top-fed fire box - it tends to flare up as it goes in. My guest list included museum members, friends, family and co-workers - in the end maybe fifty people ate. I put on the GN chef uniform I'd gotten on e-bay, and played host and waiter. |
 | I'm still collecting period paraphenalia which sort of relates to 1146. Here's a Big Sky Blue button, still on the card which explains it. |
 | Mavo Systems got the under-car steam heat removed in one eight-hour shift. They also got it done for less than their bid. I took a close look after they left, and I'm very happy with the work they did. |
 | While Mavo was working, I attempted to disassemble a vestibule side door. I failed. I was certain that by removing the screws, the trim holding the rubber strip would come off in two pieces, much like an Adlake sash. Instead, it appears the trim is one stainless steel channel which was TIG welded (?) after assembly, and the weather stripping was pressed in and the ends then glued together. Evidence for this is that surface sheet is aluminum (over a wood core) and aluminum 'rust' buildup has actually ripped the stainless trim. After a hard look at the ACF drawing, I'm convinced these are not original. |
 | While reconnecting some of the brake piping, which I'd gotten out of the way for the abatement, I noticed this loose keeper on a swing hanger pin. The pin has started to work out. Note to self: Fix before next movement. Extreme BL corner. |
 | Since I was taking pictures... Several years ago we tried to acquire the adjacent car in the "International" for the museum: observation lounge 1195 "Port of Seattle". The mechanic/car mover was impressed with its oversized center bearings, and said that was an optional upgrade for improved stability. 1146 has the same oversized center bearings, so I suspect the entire train was built that way. |
 | Cast into the end sill of the truck is the pattern number and date information. Back when he visited, Andy Spurlock from StarFire wrote down these numbers. He later found diagrams for the trucks in his files. Something I've noticed about good railroad engineers is that they all tend to collect information. I have signal and track engineer friends who do it too. |
 | The end castings, which combine the body bolster and draft gear pocket, also have pattern number and date information cast in. |
I recently learned that the ex-Santa Fe F45, which is now a luxury hotel room at the Isaak Walton Inn as Big Sky Blue GN 441, was painted in Dupont Imron 3.5 basecoat/clearcoat by Relco's shop in Albia, Iowa. The Imron distributor used was Kelly Industrial Coatings. The blue and dark gray were custom mixed according to the Pantone colors in GNRHS reference sheet #71:
| Color | Pantone | Imron |
|---|---|---|
| White | Stock | |
| Blue | 307c | M2030-42P |
| Gray | 447c | 774029-42P |
We had beatiful work weather in mid-May:
 | I found a local welding/fabrication shop who has good equipment, so I liberated a section of the door post. With the sample and original drawings, I expect they'll be able to bend up both inner and outer post sections. I've asked for eight foot lengths, of 13-gauge ASTM A606 type 4, which will replace the rusted-off bottom ends. This also exposes the body end sill for evaluation. |
 | First the weatherstripping had to be removed. Surprise, all the screws came right out with minimal help from the impact driver. Pictured here is an upper door corner, with the best screws put back in for future reference. The cover over the built-in door closer (abandoned) and the top hinge location are also visible, as is the ACF fresh air intake arrangement. |
 | The middle door hinge on this end is missing, and the lower is pretty chewed up, so I'm looking for two more. |
 | Back side of same. |
 | Location of the BL vestibule trap door hinge, before erasing the evidence. |
 | End of day: The BL body end sill is almost exposed. Door post and end sheet are cut "as needed" to replace the wasted sections. Any wood pictured is temporary to secure the car. That lower side door hinge will not come off, but since I have new replacements I can sacrifice it. The aluminum moulding around the vestibule side doors is much more of a problem. It is damaged, I have to work underneath it, and the screws are rusted solid. Therefore I'm making inquiries about getting new extrusions made. Expensive but do-able. |
 | Found in a friend's Santa Fe dining car: The sort of cast Iron stove top we think 1146 might have had. This theory from a friend who has cooked more than once in IRM's Zephyr. |
 | Good humor: A new album has just been released by the Food Critics, titled "Grease Fire". Brought to you by 1146 records. My friend on the left figured out the stove top (above.) The clever fellow responsible for this picture has cooked in 1146 more than once. I like the sweatshirt he gave me. Just imagine GN's mascot "Rocky" on the back, wearing shades and playing Jazz on an a upright bass violin. |
 | The pie cabinet now has all seven shelves. The top three were just fabricated by Roettger Welding in nearby Bayport, MN. I went there on a recommendation, and gave them this as a test project to see their workmanship. I've stamped the new shelves "1146" to match the originals. |
I learned last night that the EPA has issued a new rule. "Under the rule, beginning April 22, 2010, contractors performing renovation, repair and painting projects that disturb lead-based paint in homes, child care facilities, and schools built before 1978 must be certified and must follow specific work practices to prevent lead contamination." See the EPA web site for more information.
 | The first local fab shop did not have dies deep enough to bend the door post section, so they referred me to a specialty shop that does all their structural shape rolling: Linders Specialty Co. Conveniently they are just blocks from Jackson Street. |
 | Roettger Welding did a good job on the pie cabinet shelves, so I also asked them to fabricate extra shelves for the cup warmer. In this picture, the middle is the original I supplied as a template. |
Friday the 11th: I received an e-mail from Michael Burshtin at Amtrak, approving the collision post and handbrake modification engineering done by Starfire.
Michael Burshtin also recommended bracing the superstructure while the posts are missing. That's a good point, since the rust damage has left few solid connections between the walls and the floor. So with a couple smart friends I worked out a plan for bracing. Then I ordered the major structural shapes and bracing material from North Second Street Steel Supply.
 | The full bracing plan includes diagonal struts from the tops of the collision posts to the body end sill. To install them I'll have to remove the vestibule end door, so I started making provision to unlock the blind end from the outside. There are no keys for the existing door locks, so I bought replacement cylinders of the same size. These will accept the Best Access Systems cores which the museum uses so that I can give them access when the time comes. Surprise: The existing cylinders are 1 1/8", but the door is drilled for 1 1/2"! The new cylinder's retainer plate is slightly smaller, so they won't mount. Maybe I'll turn bushings and weld them into the doors... |
 | Problem solving: The museum's shop is occupied by three steam locomotives, awaiting inspection and a professional opinion. Until it needs to be under a roof, I'm leaving 1146 outside - where its hard to get with a welder. Oxygen Service has an annual sale during the Minnesota Street Rod Association's "Back to the 50's" show. That saved $700 off the price of a Millermatic 252. It's the current model of the museum's 250, which I learned on and which has been a workhorse. (I was drooling over the Millermatic 350P but couldn't justify the price.) |
Any steel which will need bending is beyond the museum's shop capability. I printed the relevant drawings and took them over to Linders Specialty Co. for a quote. It was acceptable, so they are cutting and bending shapes. Delivery is expected mid-July.
 | Step one of bracing: A house jack (on a plywood shim to keep it from spitting out) and two lengths of 2x2x3/16" rectangular tube. The jack and tubes are welded together, and captive inside the collision post flanges. Just for curiosity, I am going to cut - but not remove - the right collision post. If nothing shifts I don't need the diagonal struts. |
Steps forward, steps back. A few hours were spent grinding off rivet heads, so that I could examine the rust damage on the other (BL) collision post. When I got out the rivet buster, it had seized up. Apparently the last use had been with really wet air, and I oiled before using but not after. The piston was easy to free, but the shuttle valve is inaccessable and I couldn't get body disassembled - more rust. Its been soaking in penetrating oil all week.
I also found that the W8x28 wide-flange beams which ACF used for 1146's collision posts, and the W8x28 replacement material which I bought, are slightly different shapes. The new is 1/8 inch deeper flange-to-flange, while the flanges themselves are narrower. I took measurements and asked my engineer what he thought. Apparently both are within the tolerances of the ASTM spec, but at opposite extremes.
 | The bottom of vestibule end sill has been removed from below handbrake. The torch-cut rectangle is where the sheave for the chain was removed - it will be modified and reinstalled. The sheave wheel had rusted to the pin. Penetrating oil and a hydraulic press wouldn't budge it. It took heating the sheave wheel with a MAPP torch to enable pressing it out. It's pretty worn. |
The sheave wheel pin is nearly a standard brake rigging pin. I found some new old stock in the Museum's inventory which was correct in every dimension but length. It had been manufactured by EX-CELL-O, who has apparently been acquired and no longer sells brake pins. An old list of their brake pins was in the box. The sheave wheel pin would be an F-Series pin, between F-5011 (4 1/2") and F-8566 (5 1/8"). Other characteristics are "Turned and polished high-grade, high-carbon steel (SAE-1050)", style 2 (drilled for 3/8" cotter key and countersunk), shaft diameter 1 3/32", hardened to 1/8" deep between head and cotter key hole, head diameter 1 5/8", head thickness 3/8". It needs to be 4 3/4" long (excluding head) - or 4 1/4" from head to center of cotter key hole.
Searching the web, some promising-looking leads were:
A friend put me in contact with Hadady Corporation, whose rail products division sells several locomotive truck-related components (metal, rubber and plastic) including former EX-CELL-O brake pins. However, the pin length is non-standard and not in their product line.
Matt Mitsch at Wabtec sent their "standard brake pins" drawing LS-166-60, first drawn in 1954 and having revisions through 1984. Their part S10531 was closest. (1/16" over-long and 1/64" over-diameter.) He put me in contact with Carl Tipton in Customer Service for ordering.
 | Steel shapes laser cut, bent and rolled by Linders Specialty Co. |
The rivet buster was rusted up pretty well. It took the repair shop three weeks to sort it out. Lesson: oil *after* using with wet air!
Shameless Plug: Please consider supporting the restoration of GN SDP40 325. Here's an early draft of the flyer showing 325 as it will be restored. One of my projects this winter will be filling in the notch in the nose and other minor welding, to prepare it for painting.
 | After careful study, a friend decided the stainless edging on the vestibule side doors (which I started disassembling last May) had been TIG welded at the corners. So he grabbed a Dremel Moto-Tool and cut the welds. They turned out to be a very thick Plymetl sheet - 1/8" Aluminum skin on an approximate 1" plywood core. Only the stainless edging matches the orginal drawings. I doubt this door is reusable: Dry rot of the wood, the aluminum attacked by electrolysis, and the stainless edging ripped at the corners by pressure from the build-up of white crud. |
 | Here's the reclaimed handbrake sheave wheel, which was removed from the vestibule end sill in July. The wheel is a casting, the bracket bent-up 1/2" steel - no bushings in the holes, and the pin is a brake rigging pin of non-standard length. Note the deep grooving in the pin because it had "become one" with the sheave wheel. Oddly, the pin holes in the bracket are not too egg-shaped. |
 | The vestibule end sheet, after grinding the heads off the rivets and driving them out with the rivet buster. I punched the rivets in the post with the end sheet in place, to avoid dinging and denting the post. Next: The sheet will be cut on the marked line with a cutoff wheel in a 4 1/2" angle grinder. Wedges will force the sheet away from the post, so that it isn't also sliced. I'll also get a sample of the original vestibule interior color for matching. |
 | For my engineer: The BL collision post has more pitting on the end face, where the handbrake bracket was located. I've needle-scaled to remove the rust, circled the pitted areas, and marked out a 1" grid. The white mark along the left edge denotes the tapered top end of the shear post. This spreadsheet contains my guesses as to how deep the pitting is. |
 | After the steam heat was torched off, several head-knockers remained on the end casting. I like to remove them (rather than denting my head on them.) That cut lever bracket also needs to be removed to make way for the Amtrak MU and COMM receptacles. There is also a lot of rust and dirt accumulated inside the casting. |
 | All the head-knockers and the cut-lever bracket have been ground off. I grind out most of the weld, remove the remnant with a hammer and cold chisel, then grind it smooth. The red arrows show the direction of the grinding marks - parallel to the beam, not across, to prevent cracks from forming. I may bead-blast to further prevent cracking. |
 | The hand brake chain sheave wheel under the body end sill, prior to removal. The reclaimed bracket from the vestibule end sill will be installed here, tilted up at an angle. Note the casting marks - pattern 30039, cast by General Steel Castings in March of 1949. It is very possible these castings came from the Granite City, Illinois plant which is just across the Mississippi from St Charles, Missouri. These marks may be partially obscured by the tilted bracket's supports. |
 | The sheave wheel bracket has been removed, along with most of an old steam heat pipe bracket. Again, the red arrow shows the direction of the grinder marks. |
 | Parts for assembling the tilted lower hand brake chain sheave, per drawing 09053-Q002 from Starfire. This one gets welded to the end casting. |
 | Parts for assembling the upper hand brake chain sheave, per drawing 09053-Q001 from Starfire. This one sits on the 3x8 rectagular tube which forms the lower, main vestibule end sill, and will partly protrude through the top of the end sill. These pieces were made with a cutoff wheel in a 4 1/2" angle grinder, a straight edge and scratch awl, and various clamps. A shear would have been faster, but one wasn't available. |
 | I got distracted: There was enough 3/8" steel plate to make a flat griddle top for the range in the kitchen. The end is notched so that it can be lifted out. Finish work included grinding all corners, sand-blasting it clean, and then oiling it with Olive Oil. |
| My inspiration for the griddle top came from a friend's ex-Santa Fe dining car: Note there are two original cast griddle tops, but a replacement made of 3/8" plate is just visible at far left. |
A special NARP bulletin issued September first announced that the Federal Railroad Administration, Amtrak, and the American Association of State Highway and Transportation Officials (AASHTO) have agreed on a specification for the next generation of passenger rail cars. It includes Amtrak's draft spec for single-level cars, the PRIIA bi-level spec of July 31st, 2010 - based on the California Car / Surfliner design, and a draft spec for locomotives.
I believe these specs should interest any passenger car owner, because they predict the mechanical requirements our private cars will eventually have to meet.
In a brief glance, it's good to see that the basics haven't changed. 26C brakes, wheel slip control, etc. But it is interesting they they require a conduit and junction box rough-in for future application of an Electric-Controlled Pneumatic (ECP) overlay on the air brakes per AAR standard S-4200 and particularly S-4210. That will be new.
 | Seasoning the new griddle top the fun way! We made bacon cheese burgers for all the volunteers who were at the museum. The bacon press is an antique store find but I understand they're still readily available. One issue: no drain for the grease, which the cook solved by scraping it into the fire. |
I'm waiting for an opinion on replacing the collision posts in their entirety, and my real job kept me busy, so here are some of the small items I puttered on in October:
 | End grab iron pocket sub-assemblies, welded up, sandblasted, and primed with DuPont Corlar 2.1 ST. (Search Google for Corlar.) |
 | The vestibule end door is being converted for a rim cylinder which will accept any 7-pin core from Best Access Systems. I had to weld in a bushing, which a friend made, because the current standard size for rim cylinders is smaller than the door was cored for. Some Bondo and spray paint will hold things until the door gets more attention. |
 | The inside of the same door. When I disassembled the latch mechanism, a screw broke off and I found an internal spring was toast. After a friend extracted the screw the threads were bottom-tapped, and the mechanism cleaned. The interior was lubricated with graphite, the spring replaced, and it was reassembled with oval-head stainless screws. |
 | For ten years I've been looking for accurate drawer and cabinet door handles for the kitchen, with no luck. Needing access to more storage space, I broke down and bought some basic stainless handles at Menard's. |
 | The new cup warmer shelves have been installed. Now to get some stainless piano hinge and have a cabinet door fabricated. |
 | Since the hand brake is inoperable for a while, 2x4's get kicked out, and chains are easy to jump, I figured I'd better provide my own wheel chock. This one is from Aldon. This is their item #4011-35, a steel Whack-Em Double Chock with flag for flush rail. It's at the bottom of this catalog page. |
 | A wee bit o' progress in the hand brake fabrication shop. |
 | I didn't work on 1146 - busy with other stuff. Work... And restoring the GN SDP40's nose profile. |
I received word from Amtrak: The pitting in the BL collision post, where the hand brake mounting bracket sat, is adequate for continued service if cleaned, primed and painted to prevent further rust. Go ahead with the splice repair engineered by Starfire. It would also be completely acceptable to replace the entire post - and more expensive.
For a museum project, I'm building a steel enclosure to hang a generator under a car. (A Cummins Commercial Quiet Diesel QD 12000 model KDKCD.) I wasn't involved in selecting the unit, but thoughts so far: It's a 3-cylinder Kubota, which has a good reputation. Output is 50 amps 120/240 split single phase - suitable for a small post-war house. I'd have preferred 208 three-phase delta for being more Amtrak-like. The packaging is very nice: 816 lbs, 27" tall, 41.5" wide, and 24.5" deep, which compares favorably to a 30" Stadco, which leaves room for mounting. It's enclosure cuts the noise from 78 db to 68 db.
I found some interesting on-line helps for sizing the steel supports. (Disclaimer - I'm never attended a structural engineering course.)
In 2008, Congress gave the FRA instructions to survey the Tourist and Historic railroad operations, and make a recommendation whether the air brake COT&S inspection cycles should change. Here is their report.
Here's an interesting web site with illustrated guides for using crimp tools. The AMP, Burdy, and Thomas & Betts tools are also used in the railroad industry. These tools are expensive, but do high-quality work. One can occasionally find them used (like on e-bay) at better prices.